Stage
Understand, ideate
Suggested time
30mins
Participants
Scoping team
Stakeholders
How to run:
Take the time to lay out the Users Journey through your product, so you understand where all the key interaction points are.
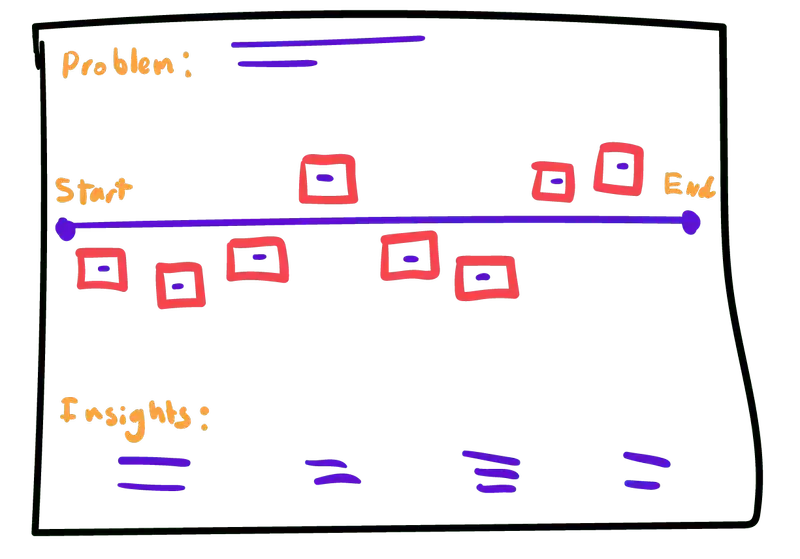
- Take any research or problem statement you have gathered and write it down on the board.
- Draw a line across the board with Start and Finish at either end.
- Start listing all the major points of a users interactions, keep them high level and focused on how it solves the users problems, don’t go off tangent.
- Refine and rearrange until the team is happy with how it flows. Make sure there is the big ‘Aha’ moment for the users where their problem is solved.
- Write up some key insights below the timeline on where to win or where areas need more investigation.
Description
The User Journey is a simple, yet effective activity to help you plot out or a understand the relationship and touch points users will have with your product. Different to a User Flow, the User Journey focuses on a much higher level of interaction. Looking at how your product solves their problem and intermingles with their lives and workflows.
User journeys tend to flow like a timeline of interactions, and when done at the start of a project, they help get the entire team on the same page of key moments they need to design for. These impactful moments help drive the development direction as they give the team clarity to focus on. Instead of focusing on a part of the product that users will not have much interaction with, the team can make quick wins with identified functions.
Method
Make sure you have a whiteboard or virtual board for this activity, and gather the scoping team and the stakeholders of the product together. This activity differs slightly for new products and existing ones. We will go over both variations in the steps below.
1. Starting at the beginning
Before you get into any timelining, firstly make sure to write down the Problem statement: what problem the project is going to be solving for everyone to see. It is your guiding star and is handy to have visible for everyone to reflect back on as they create the User Journey. If you want, you can also add the goals and success to the board.
If any prior research has been made, make sure it is available and the researcher is in the room to help explain the findings. Regardless of whether you are doing this early in the Understand stage or later in the Ideate stage, you need to make sure everyone is on the same page.
2. Set the board
Begin the User Journey by drawing a line from one end to the other. Keeping it “straight”; so you don’t go off on any tangents while laying everything out. At the start of the line, put a big label indicating where the user begins their journey with your product. Depending on your product, you may have multiple users you would like to focus on, or one primary user.
It is up to you how early this is. For projects that are part of a larger system, you could start with where they jump onto your product. For others, it might be when your users first hear about your product and start looking for more information. It might even start earlier, with the users simply experiencing the problem and showing how the product comes into their lives. Just be sure that it takes into account everything your team will need to consider when building and marketing to users.
For an existing service or system, you can approach this from the same angle. You will just have a much clearer idea of where to start.
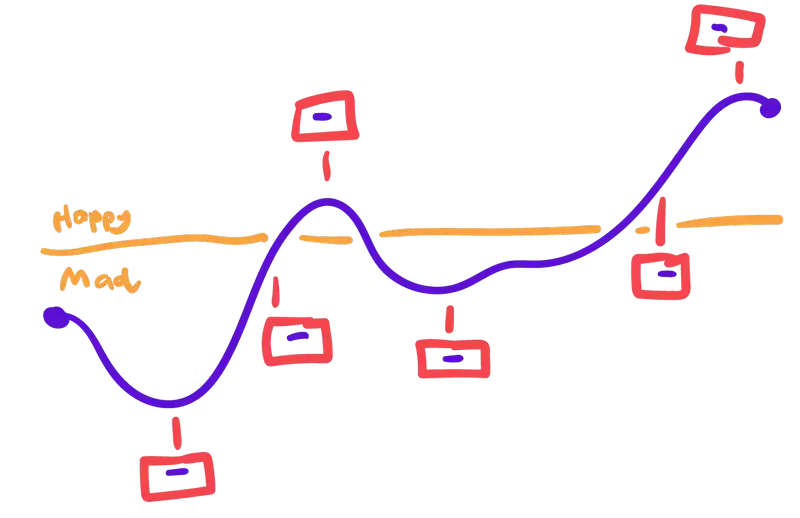
NOTE: For more experienced scopers or products with existing data, you can make the line a curved one, highlighting the users happiness and frustrations at each point and where you want to solve problems or ensure they experience maximum delight.
3. Plotting the points
With your timeline now ready to go, you can start plotting out all the different points of interaction which a user is going to have with your system; feel free to use post-it notes here. Go through each of the different ways the user is going to interact with your product. From the very first time, all the way to the end, and when they either no longer need your product or are using it as part of their daily life.
Keep it high level and focused on the problem statement at hand. It is easy to start going off on tangents as you try to think of every little issue. The goal here is to create a story of how the user’s problem is solved. It sometimes helps to draw out the user story as a visual storyboard if you get stuck listing it all down. You can learn more about storyboarding in its activity kit item.
For existing services or systems, it helps to have an expert step through each part of the workflow so the team can understand how they currently go through it. Whether you are attempting to replicate the user journey, or want to take this as a chance to improve it, start by laying out the existing.
4. Refining
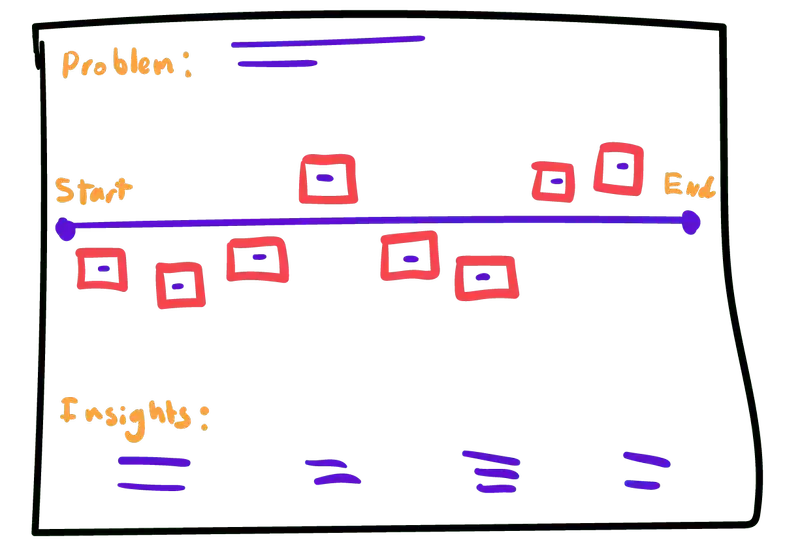
The first time you finish your User journey, it probably will not be the final version. Keep refining the flow with the team until it makes more sense; adding steps where a user might need extra things, or dropping them if they don’t add much value. One of the big parts here is to ensure you identify the ‘Aha!’ moment; the point in a user’s journey where their problem is finally solved or when they get that serious point of delight and happiness (normally the same one).
Keep rearranging until the team is happy with it and it makes sense from both a user’s angle and a development stand point.
For existing services and systems, this is a good place to start looking for ways to improve your user’s journey. Looking for places they currently aren’t happy with, or where things can be streamlined. There is no greater wasted opportunity than not improving on a system when doing a modernisation project.
5. Insights
Once the User journey is looking good, you can start writing up some insights below on the board. Things the team should investigate more, and focus attention towards while researching or ideating; opportunities where the team can make some quick wins, and pit falls that might come up or areas that might bring the whole thing down. Once you are finished, take a step back and make a quick summary and plan out a list of action items to proceed on with.
